Create a Project
Create a project for the software being distributed.
YouTube Guide
How to create a project
-
Click the Add button in the Project List.

-
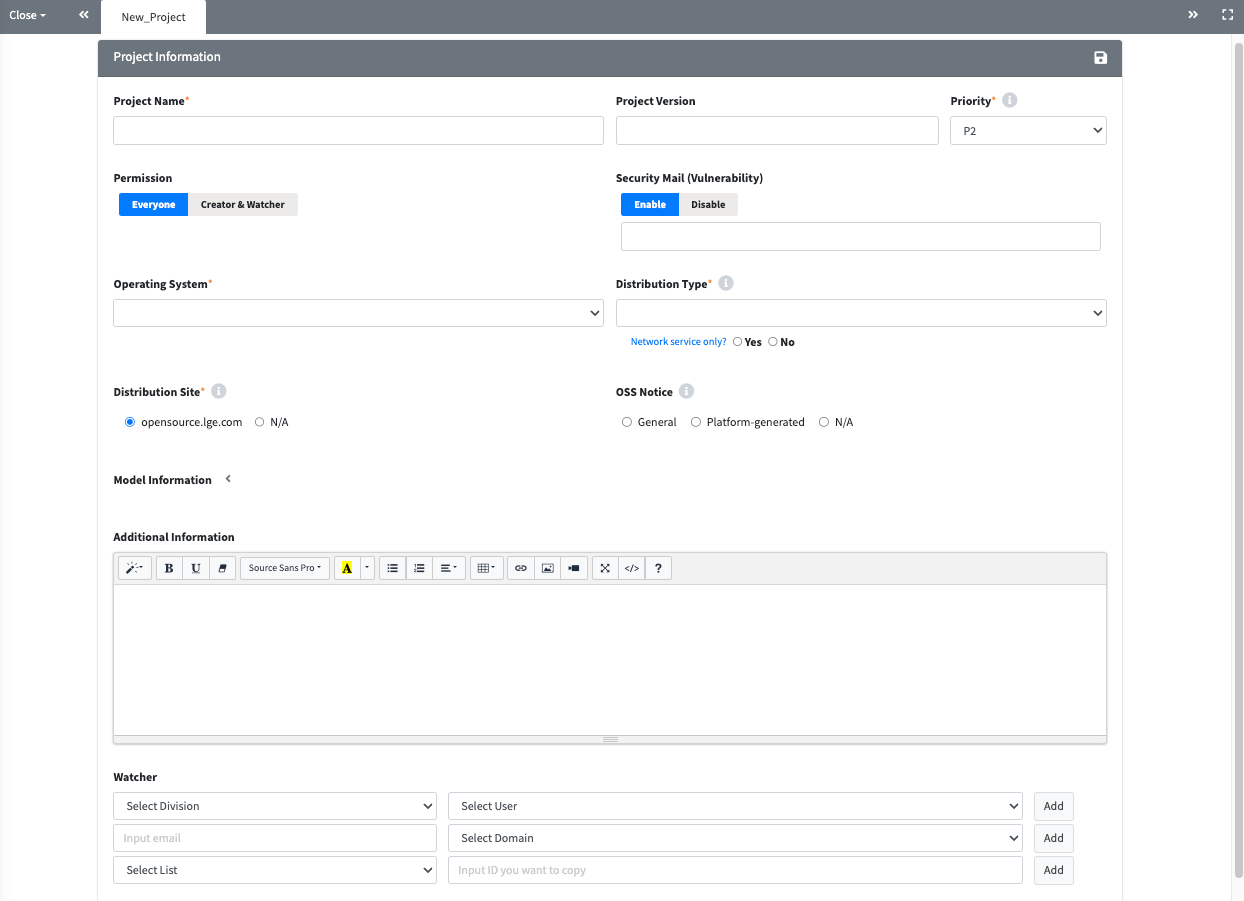
Enter the project-related information in the New_Project tab.
-
Click the Save(
 ) button at the top right corner to finalize your entries.
Project Information
This page is for entering basic information about the project.
| Item | Description |
|---|---|
| Project Name | Enter the project name.
|
| Project Version | Enter the project version.
|
| Priority | Select the priority level for the OSS notice issuance request.
|
| View Permission | Set project visibility.
|
| Security Mail (Vulnerability) | Indicate whether to receive Vulnerability emails for the project.
|
| Security Responsible Person | A specific security responsible person can be designated.
|
| Operating System | Select the operating system.
|
| Distribution Type | Select one of the following distribution types.
|
| Network Service only? | Select 'Yes' if the project is a network service (e.g., Web Service). |
| Distribution Site | Select the OSS distribution site where the OSS notice will be registered.
|
| OSS Notice | Select the appropriate OSS notice format.
|
| Model Information | Enter the model information corresponding to the project, including the release date. |
| Additional Information | Enter any supplementary information required for compliance. |
| Edit Permission | Add users who want to share the project's information and status.
|
| Comment | Enter any comments or notes related to the project. |
Share, Copy, Delete, Save, and etc.
For more details, please refer to Common Features of the Detail Screen.
-
Share(
 ): Shares the project via the generated URL.
 -
Copy(
 ): Creates a new project by duplicating the existing one.
 -
Delete(
 ): Deletes the project.
 -
Save( ): To save any modifications, ‘Save' button should be clicked.
- Drop: Changes the project's status to "Drop"; click the Open button to continue processing.
- Open: Appears when the status is "Drop"; clicking it changes the status to "Progress."
- Reopen: Changes the status of a "Complete" project back to "Progress" for reprocessing.
-
(Admin Only):
- Complete: Changes the status of fully completed projects.
- Open: Changes the status to "Progress" for projects with "Complete" or "Drop" statuses.